Whenever I post an Aurora Australis photo on social media I'm usually asked the same questions each time, so I thought I'd do a blog post which I can then re- post in response.
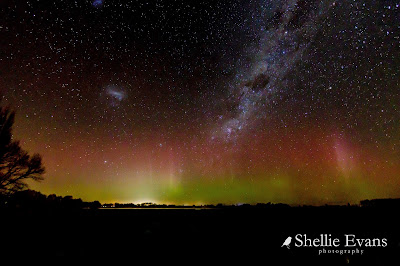 |
31/8/19- Winton, Southland
f/2.8, 8sec, ISO 1250 |
Keep in mind that I am far from an expert though, I probably know a little more than you (if you're not already a chaser) but not nearly as much as the many talented aurora experts & astrophotogs out there. I continue to learn with each new aurora.
And this is not a full and comprehensive list of 'how to' either (although now that I've proof read it, it comes pretty close!), just a few basics that might help you tick off one of your bucket list items or, like me, you get bitten by the bug and turn into a fully fledged aurora chaser!
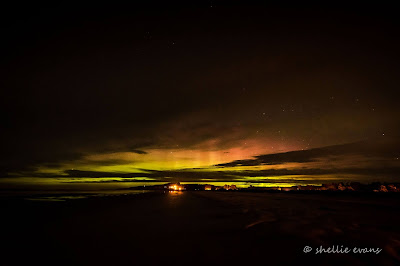 |
The turning point, my very first aurora after 3 years of waiting to view one
& the cloud nearly put paid to it too- 28/3/17 Taieri Mouth Otago
f/2.8, 15sec, ISO4000 |
Where can I see an Aurora?
On the southern horizon. The further south you are the better, the Southern Lights are usually, but not always, seen from the bottom half of the South Island. Christchurch, Mackenzie Country, Otago, Central Otago, Queenstown Lakes, Southland & Stewart Island are all top viewing areas for an aurora. It is possible to see a strong aurora from further north; I've seen photos taken in Wellington, Taranaki & Hawkes Bay but it is rare.
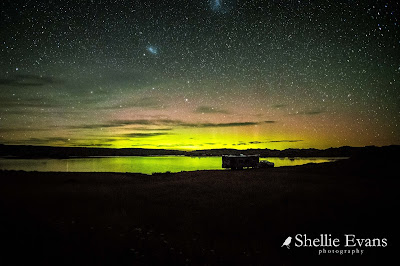 |
High on a plateau with reflections- Poolburn Dam, Central Otago
It also helps aurora chasing when I have my home with me, I can often step out the door & start shooting.
f/2.8, 15sec, ISO6400
|
You'll need to have an unobstructed clear view to the south free of clouds and away from city lights or any other light pollution if at all possible. A high vantage point such as a hill or mountain is of benefit but not totally necessary if you have that clear view south. A body of water in front of the aurora is a bonus & great for reflections. To find south either use a compass app on your phone or look for the Southern Cross, it points directly south.
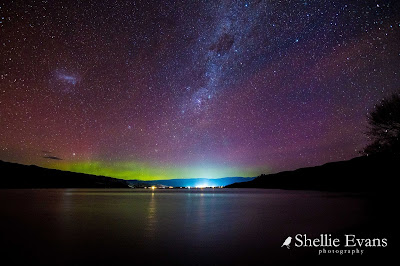 |
Surrounded by mountain ranges with Cromwell town lights directly below it was still possible
to see this aurora- 5/8/19 Lowburn, Lake Dunstan, Central Otago
f/5.6, 13sec, ISO1000 |
When does an Aurora happen?
An aurora can happen at anytime of the year through night & day but the months between March and September tend to be the best in the Southern Hemisphere due to the long clear nights of winter. An aurora is caused by solar activity on the sun and this activity is what is monitored and interpreted by the experts who usually have a few days advanced notice of an aurora happening.
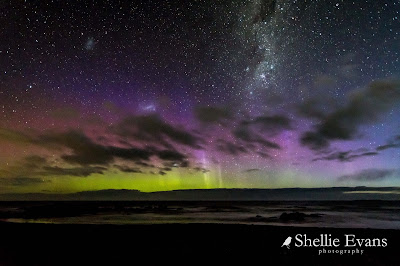 |
As blue twilight departs stage right the following darkness reveals a beautiful aurora
It can be very frustrating watching the gauges go off during daylight hours,
this aurora had been playing for a a number of hours through the afternoon -
-1/9/19, Riverton Rocks, Southland
f/2.8, 6sec, ISO1600 |
There are several internet sites & Facebook pages you can follow to get notifications of expected auroras. Sometimes there is very little warning, other times the predictions are several days out. The sites I follow are listed at the end of this blog.
The big one. Can I see it with the naked eye?
I'd like to say there's a 50/50 chance although it does depend on how strong the aurora is. Also as you get used to viewing an aurora you'll be able to pick up more & more of even the most subtle auroras. I'd describe the Lights as looking like a bright white shimmering curtain spread across the sky above the horizon with beams rolling across the curtain shooting far above into the heavens.
BUT & it's a big but, many times you will not see a thing, it will be a total disappointment. Unfortunately due to social media & the increasingly regular news stories that an aurora is about to happen, many people (often with kids & dogs in tow) rush off to the nearest vantage point to watch this amazing spectacle they've seen on their screens; great swathes of crimson, lime green, fiery reds & oranges and blasts of purple. It never looks like that to the naked eye.
This is what can be seen with the naked eye when there is a strong aurora.
The camera sensor sees a lot more colour which is enhanced when processing the RAW file.
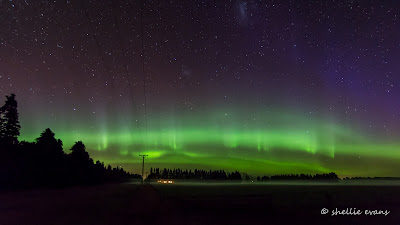 |
The Big One- 28/5/17, Oreti Plains, Southland
f/2.8, 8sec, ISO2000
|
Other times you won't see a thing until you check your shot on the back of your camera screen. This might be what you see; a very dark night and a few bright stars (those are stars not dust spots)
And this is what is revealed by the camera, a very subtle aurora. There's a little bit of euphoria when this appears on your screen after you've look out into inky blackness thinking there can't be any action out there tonight.
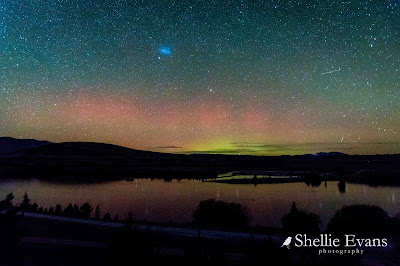 |
My latest aurora (complete with shooting star)- 7/4/21, Lake Ruataniwha, Mackenzie Country
f/2.8, 13 sec, ISO8000
|
Shorter more defined beams, known as the 'picket fence' can be seen higher up or to the side of the aurora. Or they roll over the aurora curtain as the light dances from side to side.
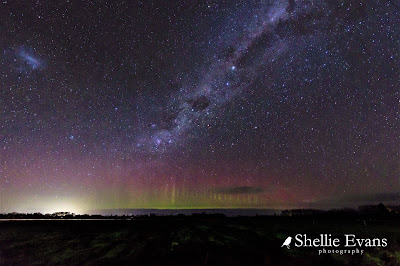 |
Picket fence- 28/8/19, Winton, Southland
f/2.8, 8 sec, ISO2500 |
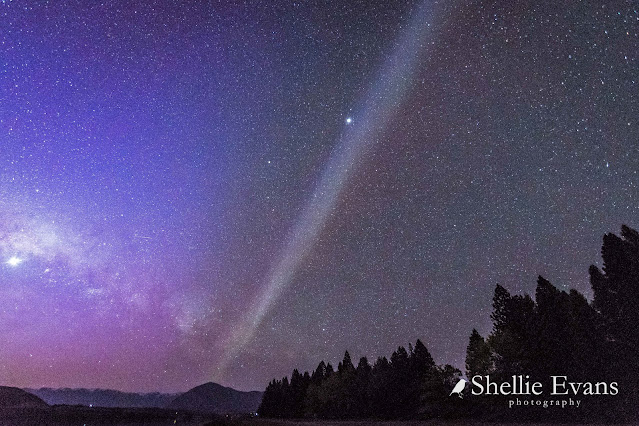
Off to the far side there is often another strong tall beam, it looks like a spotlight shining into the heavens. This beam is known as STEVE (Strong Thermal Emission Velocity Enhancement)
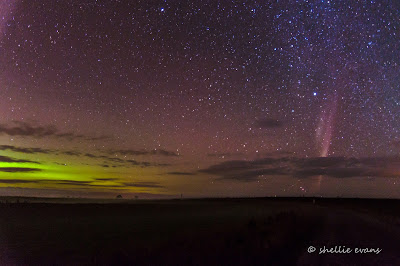 |
STEVE- 22/4/17, Isla Bank, Southland
f/2.8, 20 sec, ISO1250 |
Sometimes you get a 'bonus', STEVE and an Elon Musk (destroyer of the night sky) SpaceX Starlink trail.
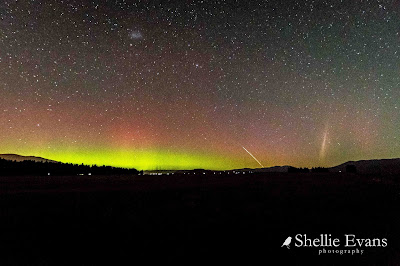 |
STEVE & Starlink Trail- Night Sky Cottages, Twizel, Mackenzie Country- 20/3/21
f/2.8, 4 sec, ISO8000 |
Can I see the colour?
Yes, but again, nothing like you see in photos or on social media. You may see a tinge of pale green & and pink in some of the stronger auroras similar to the photo below, this colouring is unusual though, usually it's shimmering white with maybe a hint of colour. Younger eyes do pick up more colour though. The camera sensor is much more sensitive than our eyes and with a slow shutter speed & large aperture (small number) the lens lets in a lot more light & colour. Sometimes there's also a bit of artistic license taken by photographers in some of their photo processing.
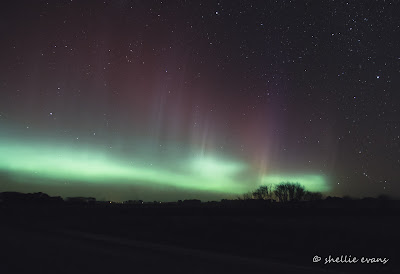 |
The Big One- 28/5/17, lost somewhere on the Oreti Plains, Southland
f/2.8, 6sec, ISO4000 |
What camera settings should I use?
How long is a piece of string? Not quite but nearly. Camera settings depend on some key factors; how strong the aurora is and how dark the sky is. Every aurora is different and just when you think you've nailed it, the next one will have you fumbling in the dark again. But generally there are a few things you do need to follow, then adjustments can be made as you progress.
A tripod is a must, you will be taking slow shutter-speed photos, any movement will destroy your once-in-a-lifetime photo. If you don't have a tripod you might be able to make do with a fence post, the top of the car or a nearby rock at a push. But you've been warned, it must be super steady & obviously pointing in the right direction.
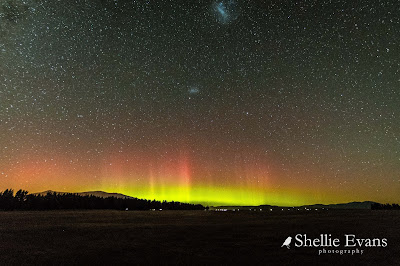 |
From the back fence of Night Sky Cottages- 20/3/21, Twizel, Mackenzie Country
f/2.8, 13sec, ISO10000 |
Remote Trigger- to remove any camera shake when the shutter is depressed. If you have one this is good but you can also use the delayed timer on your camera, I have both but tend to use my delayed timer at 2sec just because it's sometimes quicker & easier to setup (I'm always in a rush). The delayed timer allows you to press the shutter & move your hand away before the photo is taken.
Camera- the best camera is the one you have with you; phone, point & shoot, dSLR or anything in between can capture an aurora.
A fast wide angle lens is great for capturing the full width of the aurora. The wider the better, mine is a f/2.8, 11mm lens. Fast relates to how big the aperture (the f number) is on the lens. The aperture lets light onto the camera sensor, the bigger the aperture (the smaller number, just to confuse you) the more light is let in and the faster the shutter speed can be. Faster shutter speeds 'freeze' the aurora action & make any movement & the aurora beams more defined rather than smoothed out over a longer shutter speed. An aperture of f/1.4 is the ultimate but you'll pay big money for that lens. But really, just work with what you have.
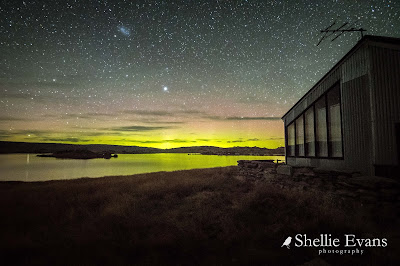 |
Fishing Crib, Poolburn Dam, Central Otago- 21/2/21
f/2.8, 20sec, ISO10000 |
Focus is really important and often the hardest thing to achieve. Remember it's pitch black out there and your auto focus ain't going to work. If you have an infinity focus setting use this, it's the small figure eight symbol on it's side.
Otherwise there are a couple of other options; during daylight auto focus on a far away tree or building, then move your lens carefully onto manual focus & don't touch it again, it's set ready to take an aurora shot. Tape it in that position if you have too (this only works if you have a separate lens).
During darkness you can use your camera's back viewing screen and zoom in on a bright star, manually focus on this and then don't touch the focus again. But do keep checking your photos out through the course of the evening, it's quite common to knock the focus and there's nothing worse than getting home & finding the majority of your photos are out of focus.
In my hurry to capture the aurora going crazy behind the cottages (read stumbling through a tangled garden to get to a high point) I bumped my focus & didn't recheck it until after the activity had died down. My 'million dollar shot' was ruined. Click the photo to enlarge to check it out.
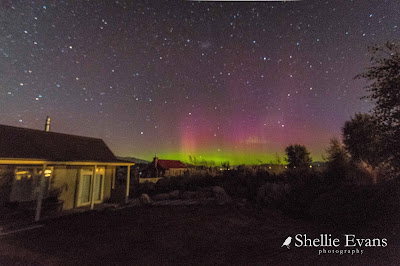 |
Night Sky Cottages, Twizel, Mackenzie Country- 20/3/21
f/2.8, 4 sec, ISO6400 |
Below is how sharp the above photo should have been. And here you can also see the difference in settings, the moon that highlighted the cottage in the above photo had just about disappeared behind the mountains & the brightness of the aurora has died down so the settings on the photo below have increased to let more light in.
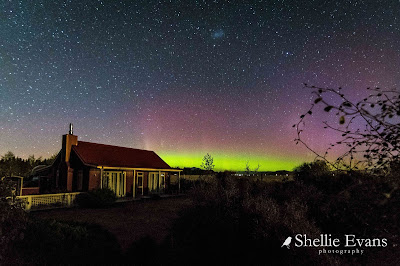 |
Night Sky Cottages, Twizel, Mackenzie Country- 20/3/21
f/2.8, 8 sec, ISO10000 |
For better quality & more detail, shoot your photo files in RAW if possible. Even a combination of Jpegs & RAW is good if you're not sure how to process RAW files. At least you'll have something to work on as you get better skilled at processing photo files.
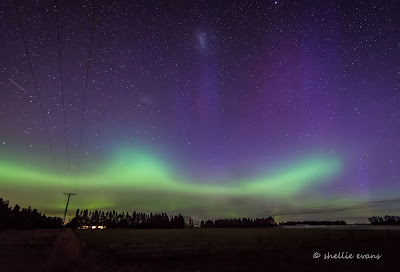 |
The Big One- 28/5/17, Oreti Plains, Southland
f/2.8, 13sec, ISO1600 |
Now the actual settings;
Switch your camera to manual. Sorry but auto won't cut the mustard this time. This is all about the exposure triangle, one of the most important things you can learn about photography. Aperture- Shutter Speed- ISO. The art is in balancing all three to get the right exposure of the shot.
The following settings will depend on the brightness of the aurora & whether there's a moon or not (or any other light) and are an average only. You'll need to experiment & adjust to suit the night.
ISO 6400 -12800
You can go higher but this can introduce more 'noise', that grainy effect you see on low light photos.)
Shutter Speed- 10-30 seconds
The darker the night the longer the shutter speed. The longer the shutter speed the more smoothed out the scene will be. And you'll also have the beginning of star trails.
Aperture- as already mentioned the wider (small number) the better. My lens is f/2.8. You want to let in as much light as possible, it's pretty dark out there even when there's pesky moonlight illuminating the scene.
And that's it, click away! Oh wait....one more thing, make sure you have a full battery &/or a spare. Night photography draws a lot of battery, you don't want to run out right in the middle of a great show.
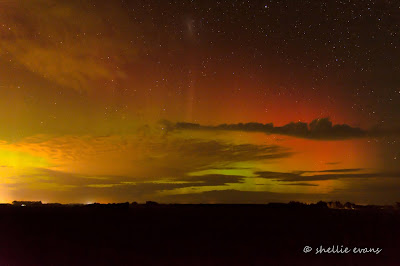 |
Oreti Plains, Southland- 22/4/17
f/2.8, 6sec, ISO1000 |
Processing
If you've shot in Jpegs you're good to go.
If you've shot in RAW you'll need to process the files. RAW files are like the negatives of film cameras. They need work done to them to bring out the scene you have captured (in other words they need to be developed). This is an art in itself and can take quite a bit of learning with lots of trial & error especially with night shots. And just when you think you have it covered the next aurora will be completely different & you'll have to start all over again. I use Lightroom 99% of the time, Photoshop occasionally and there are also other photo processing programmes out there that specialize in astrophotography.
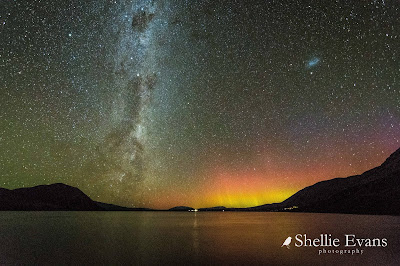 |
Round Bush, Lake Ohau, Mackenzie Country- 13/3/21
And even when you haven't quite got that clear view looking south
give it a go. You may surprise yourself.
f/2.8, 10sec, ISO16000 |
Before we move on to the aurora sites to follow, there's one last item...
Aurora etiquette
You'd think that it's a big wide world out there and there would be plenty of places to view an aurora from and have the place to yourself. And sometimes you can find those places but more often than not & especially once you start following the aurora pages you'll learn that there are certain locations where it is very popular to watch and photograph the aurora from.
There is really only one tip but it's the most important etiquette tip of all. Do not make light.
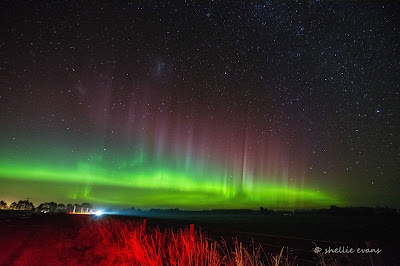 |
The Big One- 28/5/17, SH6, Winton, Southland
Headlights of an approaching vehicle & taillights illuminated the roadside vegetation.
f/2.8, 68sec, ISO4000 |
Please don't go driving into the location with your lights blazing. You will most certainly get the glare from others already there. Have your camera set up & clothing/jackets/drink bottle etc orgainised as much as possible before you leave so you're not shining torches or need your inside car light on as you fumble about locating your gear.
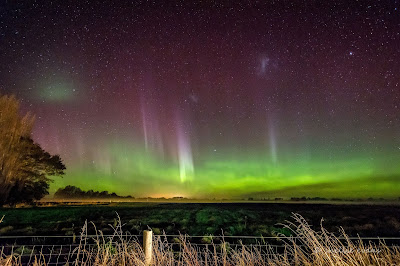 |
The Big One- 28/5/17, Winton, Southland
Headlights left on as the car occupants checked out the action which was clearly visible
to traffic on the highway (luckily the shot wasn't too bad, the light illuminating the foreground)
f/2.8, 5sec, ISO5000 |
Turn your park lights on if you need to see & drive very carefully as there will be photographers already standing with their tripods shooting the aurora. Turn you car's inside light off before you open the door so you don't flood the area with light. Any artificial light will ruin their shots especially if they are doing a timelapse of the aurora which can run from a few minutes to a few hours.
Bright lights also destroy your night vision and those around you too (night vision can take 15-20 minutes to regain, longer if you have older eyes). You risk missing out on actually seeing that aurora with the naked eye while waiting for your night vision to return.
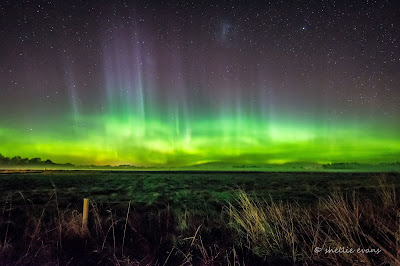 |
The Big One- 28/5/17, Winton, Southland
f/2.8, 4sec, ISO3200 |
Leave your cellphone in the car. It's light, including the flash, is the biggest destroyer of all.
Turn your camera's back display screen down as low as you can or off, believe me it's really bright when you are out there on a dark night, even when you might have the place to yourself. It'll not only ruin other's photos it'll blind you to what activity is going on around you. Like the possum that tootled past brushing my tripod one night.
Disable your camera's flash, turn it off before you get to your location. It has no purpose at all in aurora photography.
Wear a head torch (on very low beam), face away from the aurora to use it and use it sparingly. Photographers are usually very friendly but don't go bowling up to them with your head torch shining brightly into their eyes and camera asking for tips. Do not use any red light, they are great if you're an astronomer but no good at all if you are an astrophotographer. You could use a small torch and use your hand as a shade cupped around it.
I'm sure you've now got the message- Do Not Make Light
ETA- here's what can happen when you flood the scene with vehicle headlights, this happened to me a couple of days after I wrote this blog at the Tekapo River in Mackenzie Country.
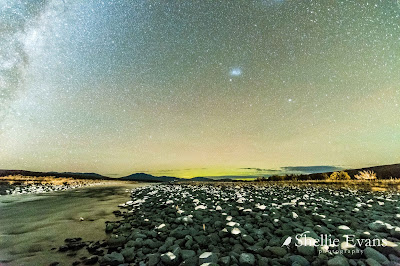 |
| Riverbed rocks highlighted by the headlights |
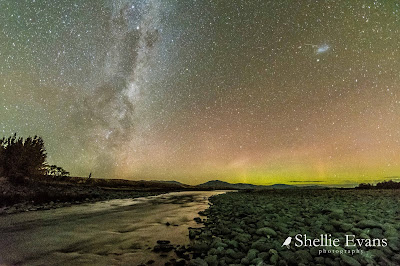 |
What it should have looked like- Tekapo River- 17/04/21
f/2.8, 13sec, ISO16000 |
One final tip, look for items that shouldn't be in the scene, like powerlines (click to enlarge).
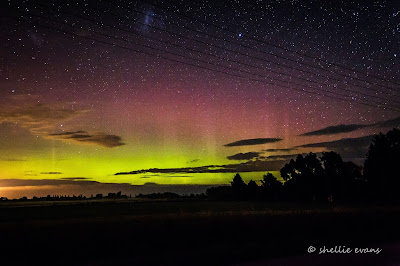 |
And also make sure you check your back screen display once you have captured a couple of shots,
check for items that shouldn't be in the shot, things like powerlines! (see above photo)
And especially if you have a wide angle lens which covers a large area.
22/4/17, Winton, Southland, f/2.8, 10sec, ISO1000 |
Sites to follow
And now for those sites to follow. This is not a comprehensive list by any means but the ones I follow and find very handy. You may need to do a bit of homework to understand some of what they are reporting (I can't hand it all to you on a plate) but at least you'll have something to work on.
Facebook-
Aurora Australis (NZ)
This is the site for checking in on what is happening each night, for posting photos, asking questions or anything else to do with the aurora and is great for seeing what people are doing & where they have been. Look for Les' daily report on predictions for the coming night. You're also likely to get notifications of solar storms & alerts as they happen, as long as contributors are not out there capturing their own photos.
Shellie Evans Photography
Like & follow my photography page, I'll post a message when I think there's a decent aurora due. I can't guarantee it but I'll do my best. Sometimes there is very little notice & I'm too busy 'Out There' doing my own aurora chasing.
Websites-
Glendale App Aurora Alerts New Zealand
This is a great app to check out and my go to for alerts & real time graphs & gauges. after the Aurora Australis NZ Facebook page, once you navigate around all the advertising.
Learn about solar wind speed & Kp numbers, the higher the Kp number the stronger the aurora. The Kp number measures the strength of the aurora. It runs from 0 (very weak) to 9, which indicates a major geomagnetic storm with strong auroras. Anything above Kp5 is classed as a geomagnetic storm. And remember to convert the time to NZ, it's often shown in UTC (Universal Time)
SpaceWeatherLive
This one has a great KP-index indicator.
And finally
Here is the link to the blog I wrote about The Big One, the aurora I've mentioned several times through this blog- An Absolutely Amazing Aurora
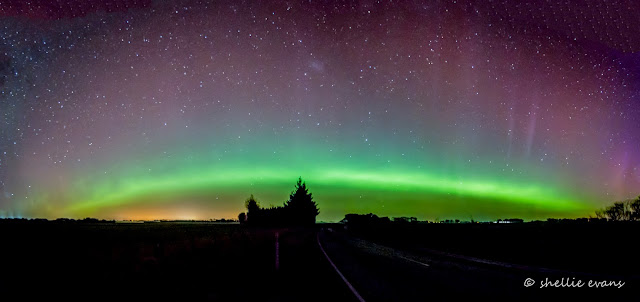 |
The Big One- a quick grab somewhere on the road to Riverton, Southland
Two photos stitched together, Invercargill city light glow on the left.
Even with an 11mm lens it's sometimes still not wide enough to capture a full aurora
28/5/17- f/2.8, 6sec, ISO4000 |
Auroras since writing the blog;
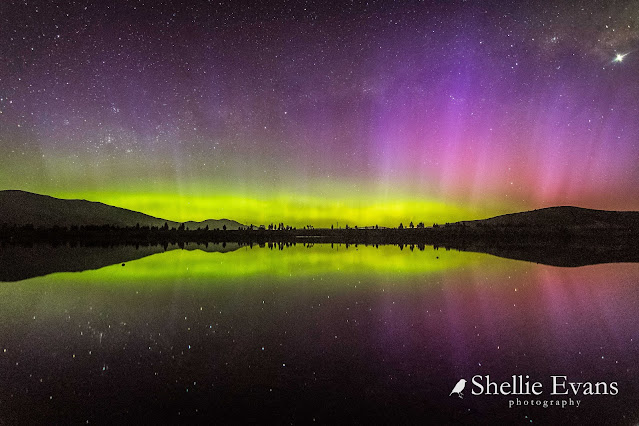 |
Spectacular Aurora- 4/11/21, Lake Ruataniwha, Twizel
f/2.8, 5sec, ISO8000
|
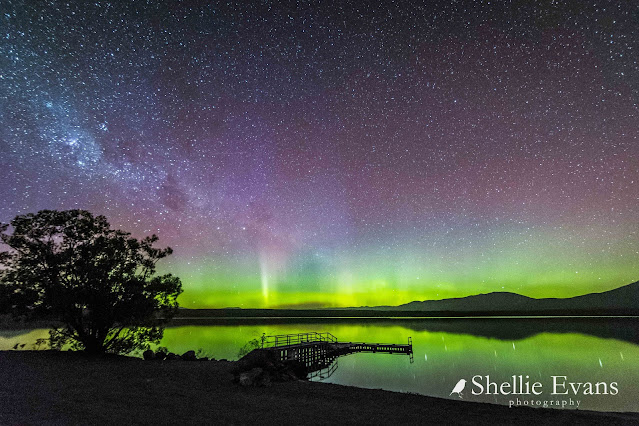 |
Spectacular Aurora- 4/11/21, Lake Ohau, Mackenzie Country
f/2.8, 15sec, ISO12800
|
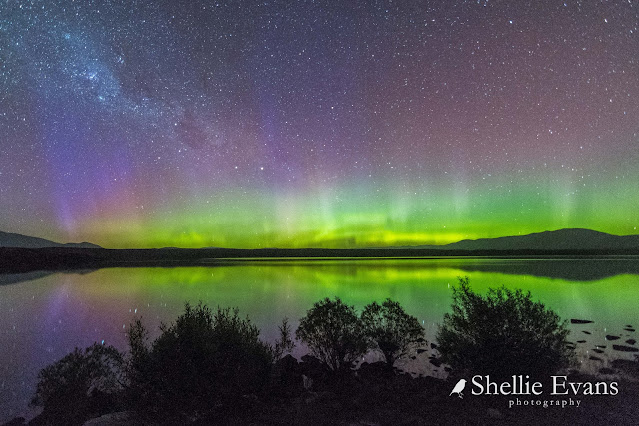 |
Spectacular Aurora- 4/11/21, Lake Ohau, Mackenzie Country
f/2.8, 10sec, ISO12800
|
.jpg) |
An impressive STEVE beam (Strong Thermal Emissions Velocity Enhancement) Looking west
Spectacular Aurora- 4/11/21, Lake Ruataniwha, Twizel
f/2.8, 6sec, ISO12800 |
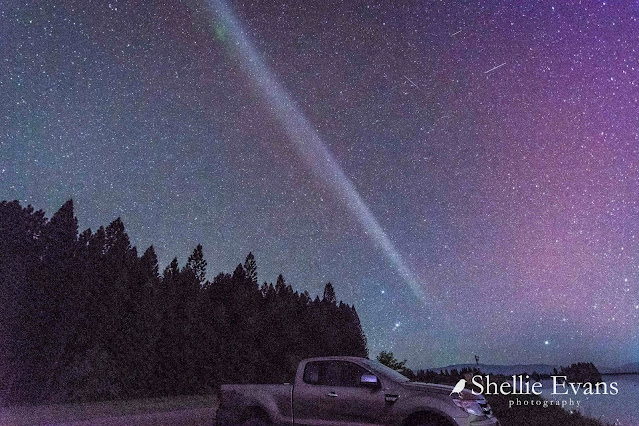 |
An impressive STEVE beam (Strong Thermal Emissions Velocity Enhancement) Looking East
Spectacular Aurora- 4/11/21, Lake Ruataniwha, Twizel
f/2.8, 6sec, ISO12800 |
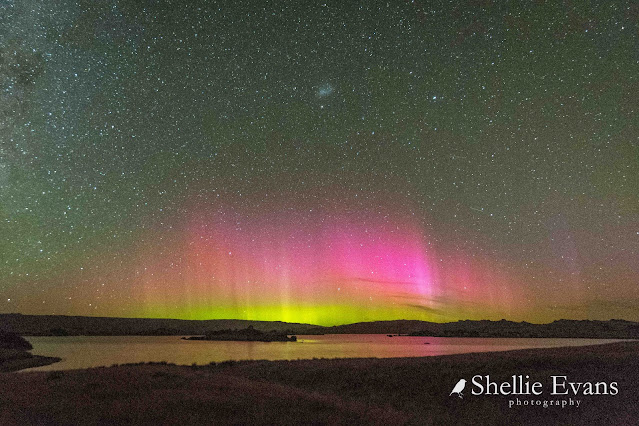 |
Poolburn Dam, Central Otago 27/02/22
f/2.8, 8sec, ISO16000 |
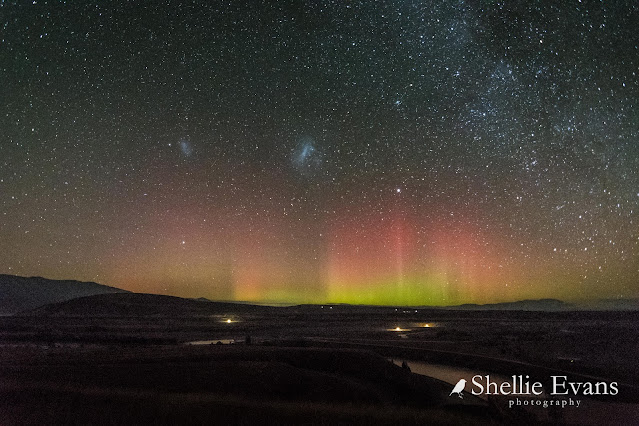 |
Lake Ruataniwha, Twizel 14/03/22
f/2.8, 8sec, ISO16000 |
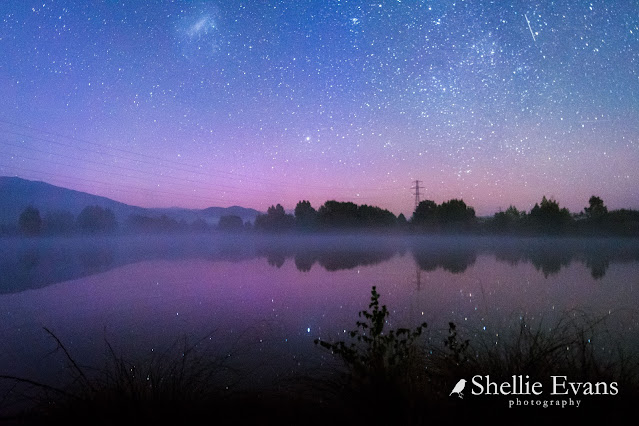 |
Just before dawn blue hour & fog over Kellands Pond, Twizel, 14/03/22
f/2.8, 15sec, ISO12800 |
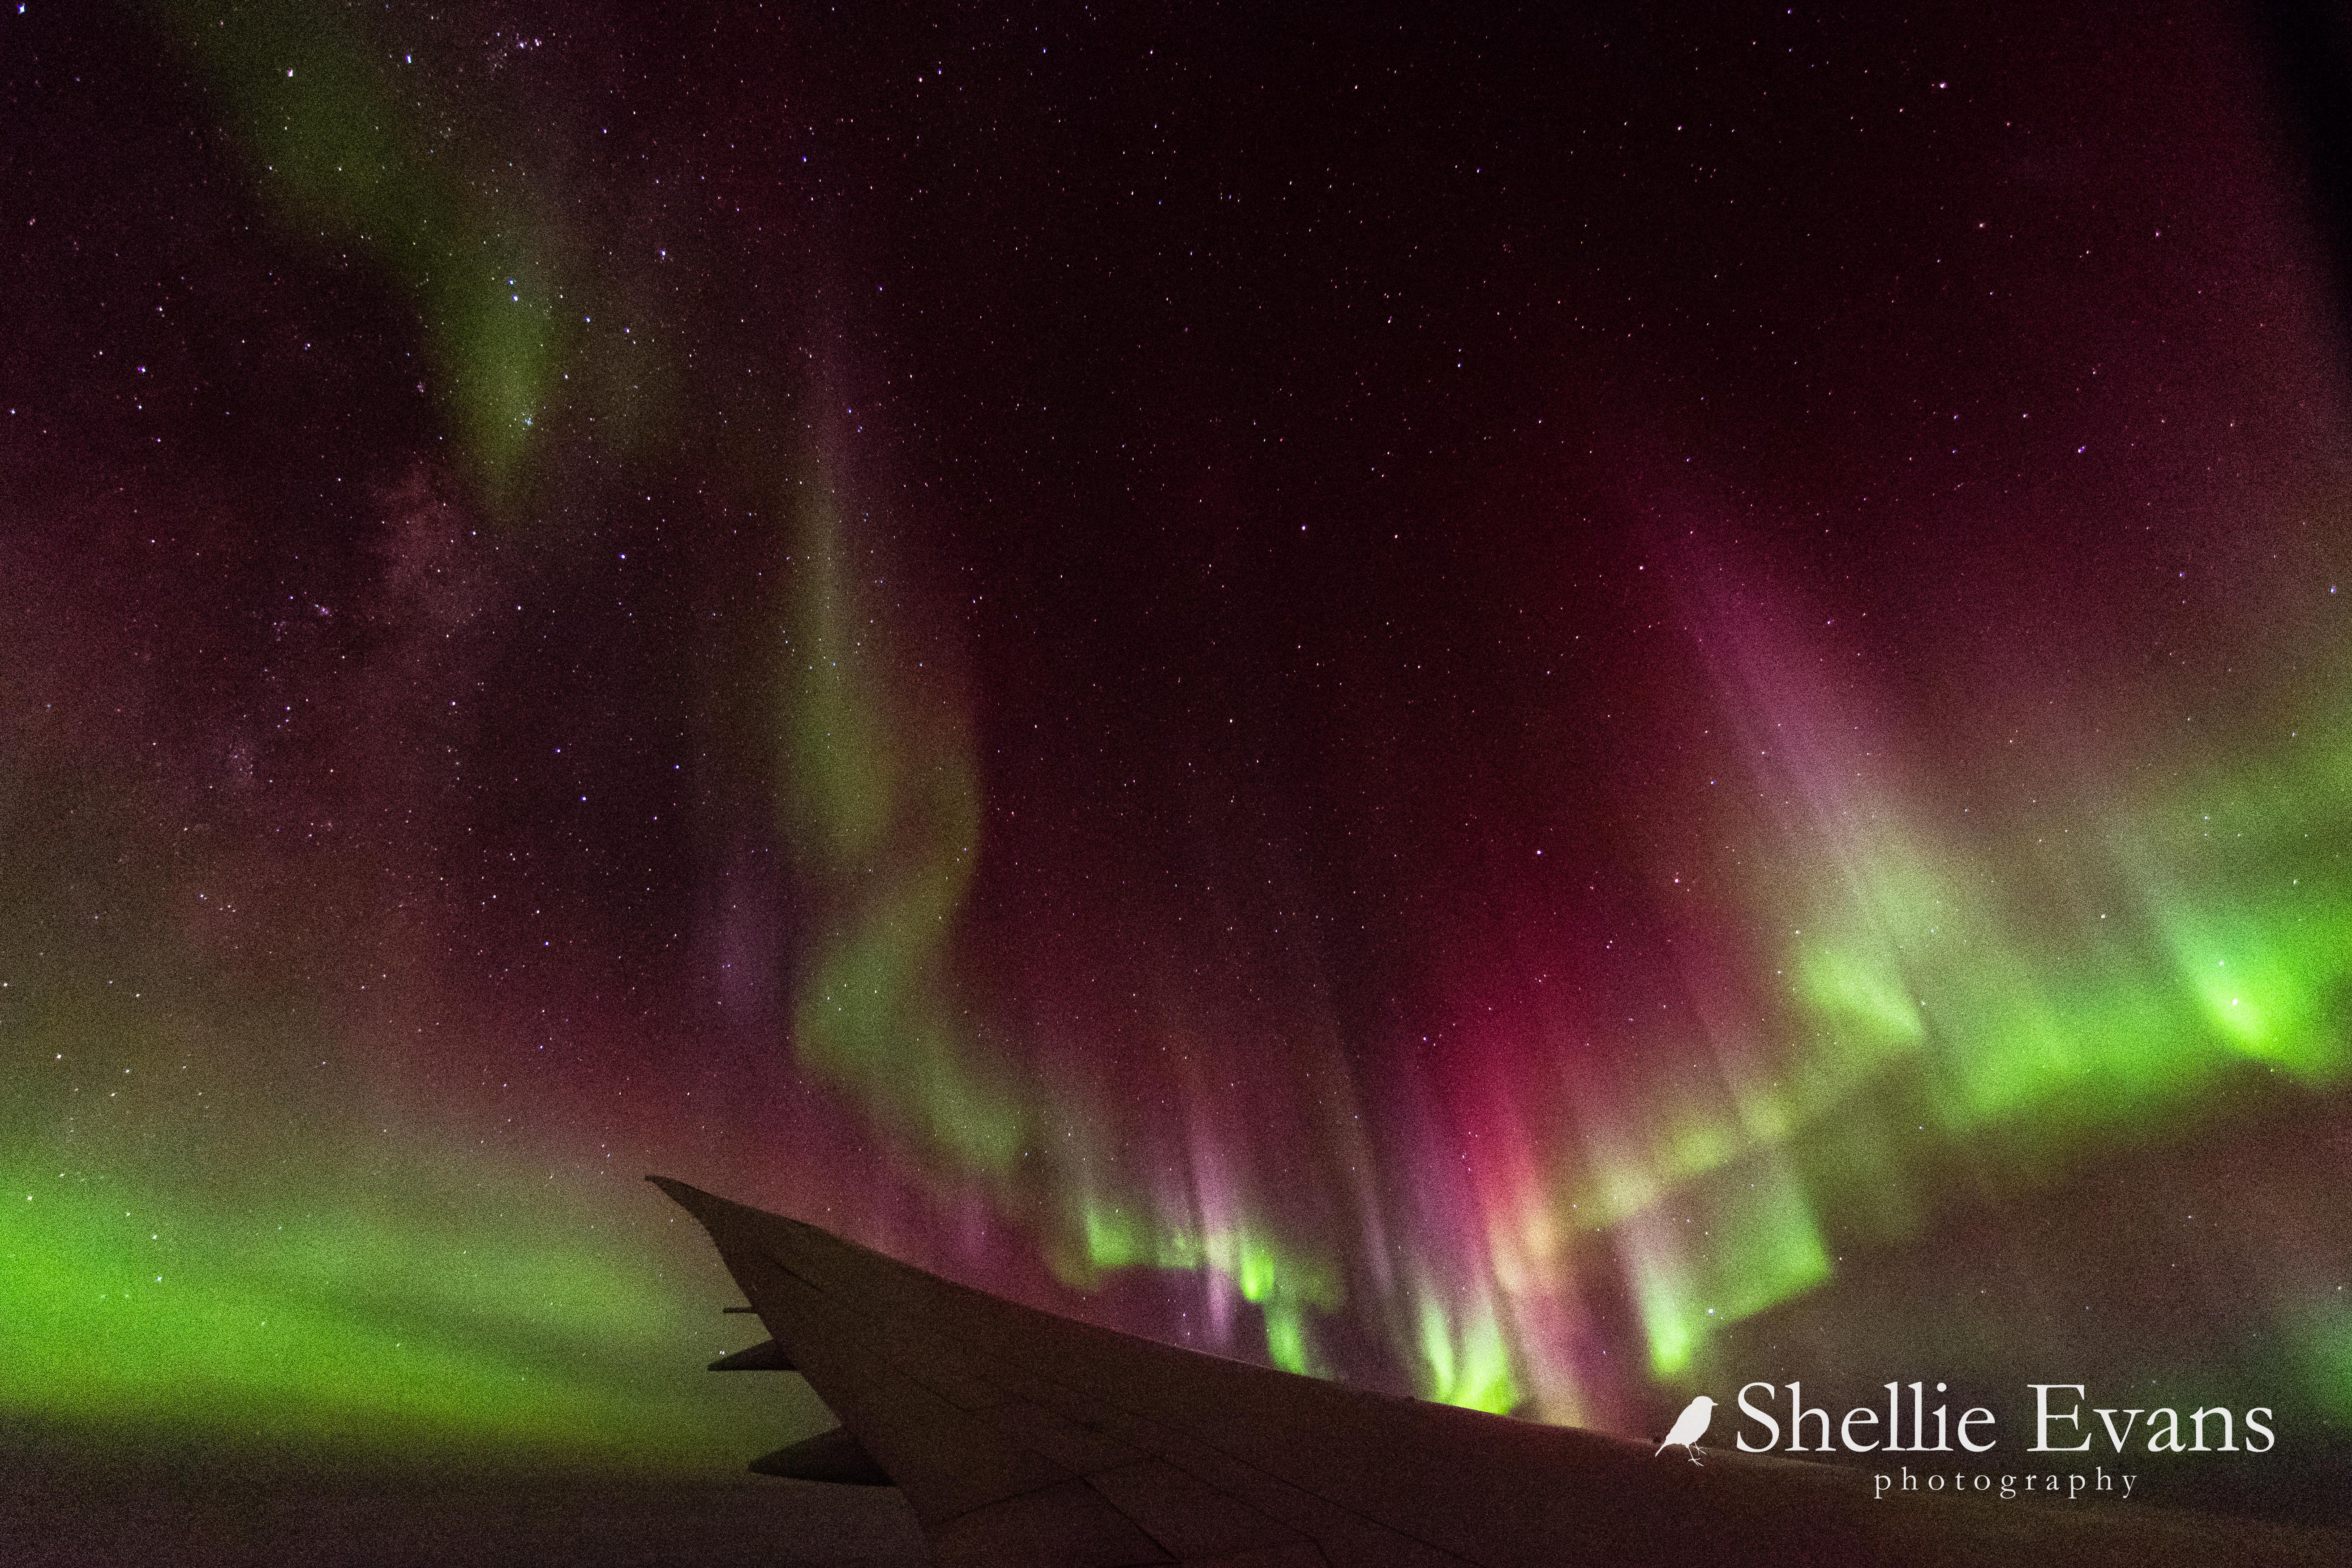
And the ultimate & a trip of a lifetime for an aurora chaser;
More photos from the flight here-
Southern Lights Photo Album
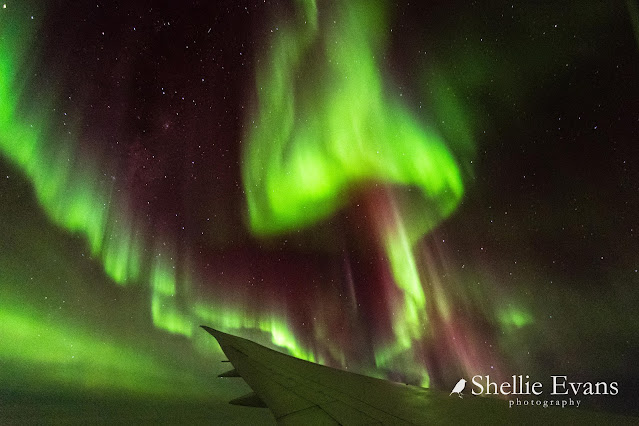 |
Flight to the Lights, Southern Ocean 1/2 April 2022
f/2.8, 2.5sec, ISO10000 |


.jpg)


.jpg)




.jpg)


